
Building a Smart Mirror with MQTT Displays
11.12.2024 - Engine: Gemini
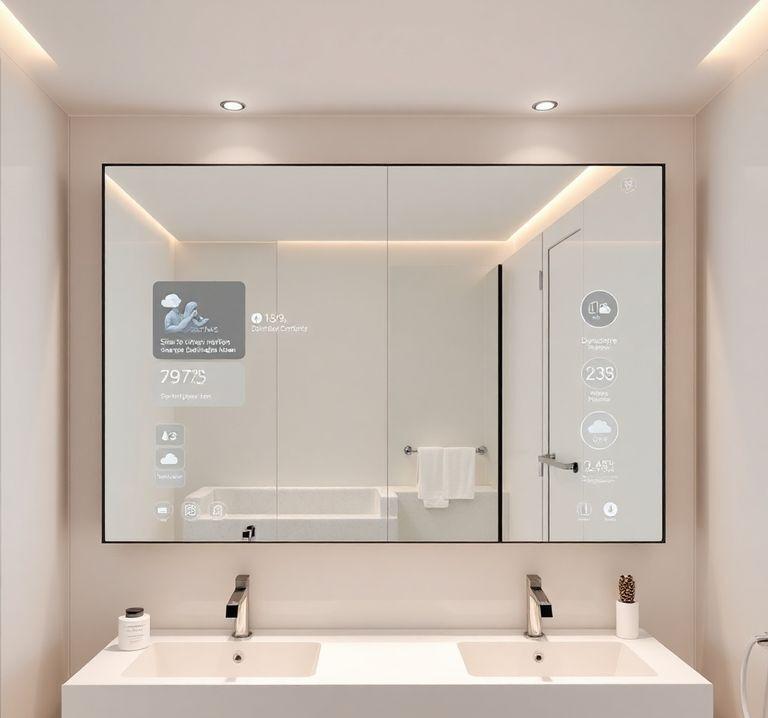
Building a Smart Mirror with MQTT Display
Materials:
- Two-way mirror
- Display (touchscreen recommended)
- Raspberry Pi or similar single-board computer
- MQTT broker
- MQTT client software (e.g., Node-RED or Mosquitto)
Steps:
Hardware Assembly:
- Mount the display behind the two-way mirror.
- Connect the Raspberry Pi and display to power and each other.
Software Setup:
Install MQTT Broker:
- Install an MQTT broker on your Raspberry Pi, such as Mosquitto.
- Start the broker service.
Setup MQTT Client:
- Install Node-RED or another MQTT client on your Raspberry Pi.
- Create a flow or script that listens to messages from a specified MQTT topic.
- Configure the client to connect to the MQTT broker.
Create Mirror Interface:
- Develop a web-based user interface or a native app for the mirror.
- Integrate MQTT functionality so the interface can receive and display messages from the client.
MQTT Integration:
- Configure Node-RED or your MQTT client to subscribe to MQTT messages from the broker.
- Send MQTT messages from the Raspberry Pi or another device containing the desired information.
- Design the mirror interface to display the received messages in real time.
Example Display:
Consider displaying the following information via MQTT:
- Time and date
- Weather forecast
- News headlines
- Calendar events
- Smart home controls
Additional Features:
- Voice Control: Integrate a voice assistant like Amazon Alexa or Google Assistant.
- Motion Detection: Detect when someone is in front of the mirror and automatically turn it on.
- Custom Widgets: Allow users to create and add their own widgets.
Conclusion:
Utilizing MQTT enables the creation of a smart mirror that displays information in real time. With custom widgets and additional features, you can create a practical and personalized device that enhances your daily routines.


